Building A Thermostat Using Arduino
I’ve completed the first pass of what seems to be a popular electronics self-education project: a home thermostat. I’ve already written about some of the software, and now I’d like to share some of the hardware details.
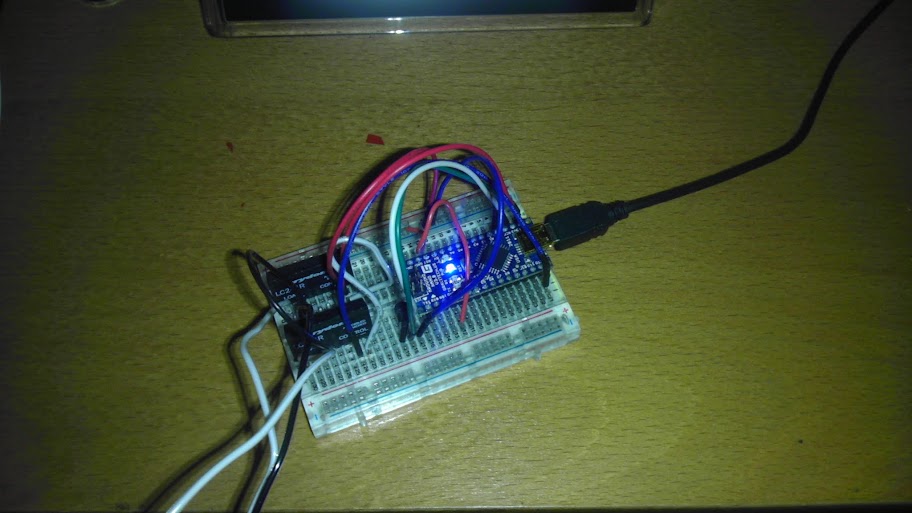
Detecting the Temperature The brains of the project is an arduino nano (a digital microcontroller). It has an input connected to a temperature sensor from Adafruit, and it does a little math to convert the analog reading from the sensor into the ambient temperature.
Controlled the HVAC As the acronym suggests, my HVAC unit has three functions: heating, fan (“ventilation”), and A/C. Each of these is controlled by closing a circuit from a common 24VAC line. If you take the faceplate off my old thermostat, you can see which terminals are used for these functions: RH: The common 24VAC source W: Heat Y: A/C G: Fan 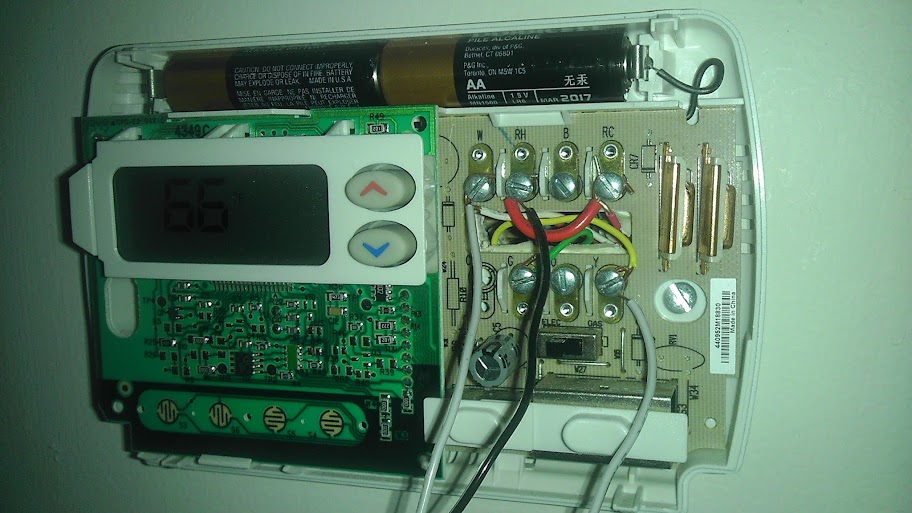
Connecting RH to W/Y/G will tell the HVAC to kick that function on, so putting a relay between those lines allows me to programmatically flip the switch. I only have two relays (heat and A/C) because I never actually use the fan, but adding that would be trivial. The relays I use can switch 12-240VAC, and require 4-10VDC as digital input, which means 1) it can handle 24VAC on the HVAC side, and 2) it can be toggled directly by the output of my arduino (5VDC).
Setting the Temperature The arduino is connected via USB to a computer, which sends data to set the desired temperature. The computer runs a program (written in nodeJS) which periodically polls a public Google calendar to fetch the scheduled temperature.
 Fun With Logs The arduino sends logging info back over the cable to the computer, which logs and graphs the data.
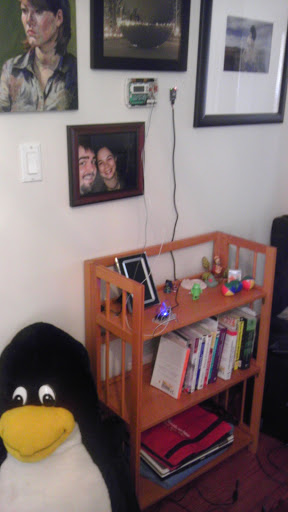
Not Pretty, But It Works! Here is the completed setup. You can see the thermostat sitting on the shelf, and the wires going up to connect to the terminals on the old thermostat. The old unit is still there only for the handiness of the terminals (as opposed to just having wires coming out of the wall). You can also see an unrelated XBee hanging on the wall to the right. That is part of Power Hungry.
TODO I’d love to make the project more permanent, either with a real PCB (if I can get over the pain-threshold of learning and using Eagle to design the circuit board), or at least with a soldered breadboard. I’d also like to come up with a cool case, probably using my 3D printer and some laser-cut acrylic from ponoko. I’d also like to go over the arduino code and clean it up, because I kinda hacked my way through it to get it to work.
The Code You can get the code (for the arduino, and the graph server) on github.